Email Client Setup
Email Client Setup
Learn how to set up your PDG Mail account with various email clients and devices.
Before You Begin
Make sure you have:
- Your email address and password
- The appropriate email client installed
- Access to your device's settings
1. Auto Configuration for Apple Devices
PDG Mail offers automatic configuration profiles for iOS, MacOS and iPadOS platforms. Our profiles are digitally signed to ensure they are secure and authentic.
- After creating an account, look for the "Apple Mail" button at the bottom of the details screen
- Download the provisioning profile
- Double click the profile to install
iOS and iPadOS Setup
You have two options for setting up your iOS or iPadOS device:
Important: Due to Apple security restrictions, profile installation ONLY works through Mobile Safari on iOS/iPadOS. Third-party browsers will not work for downloading or installing profiles.
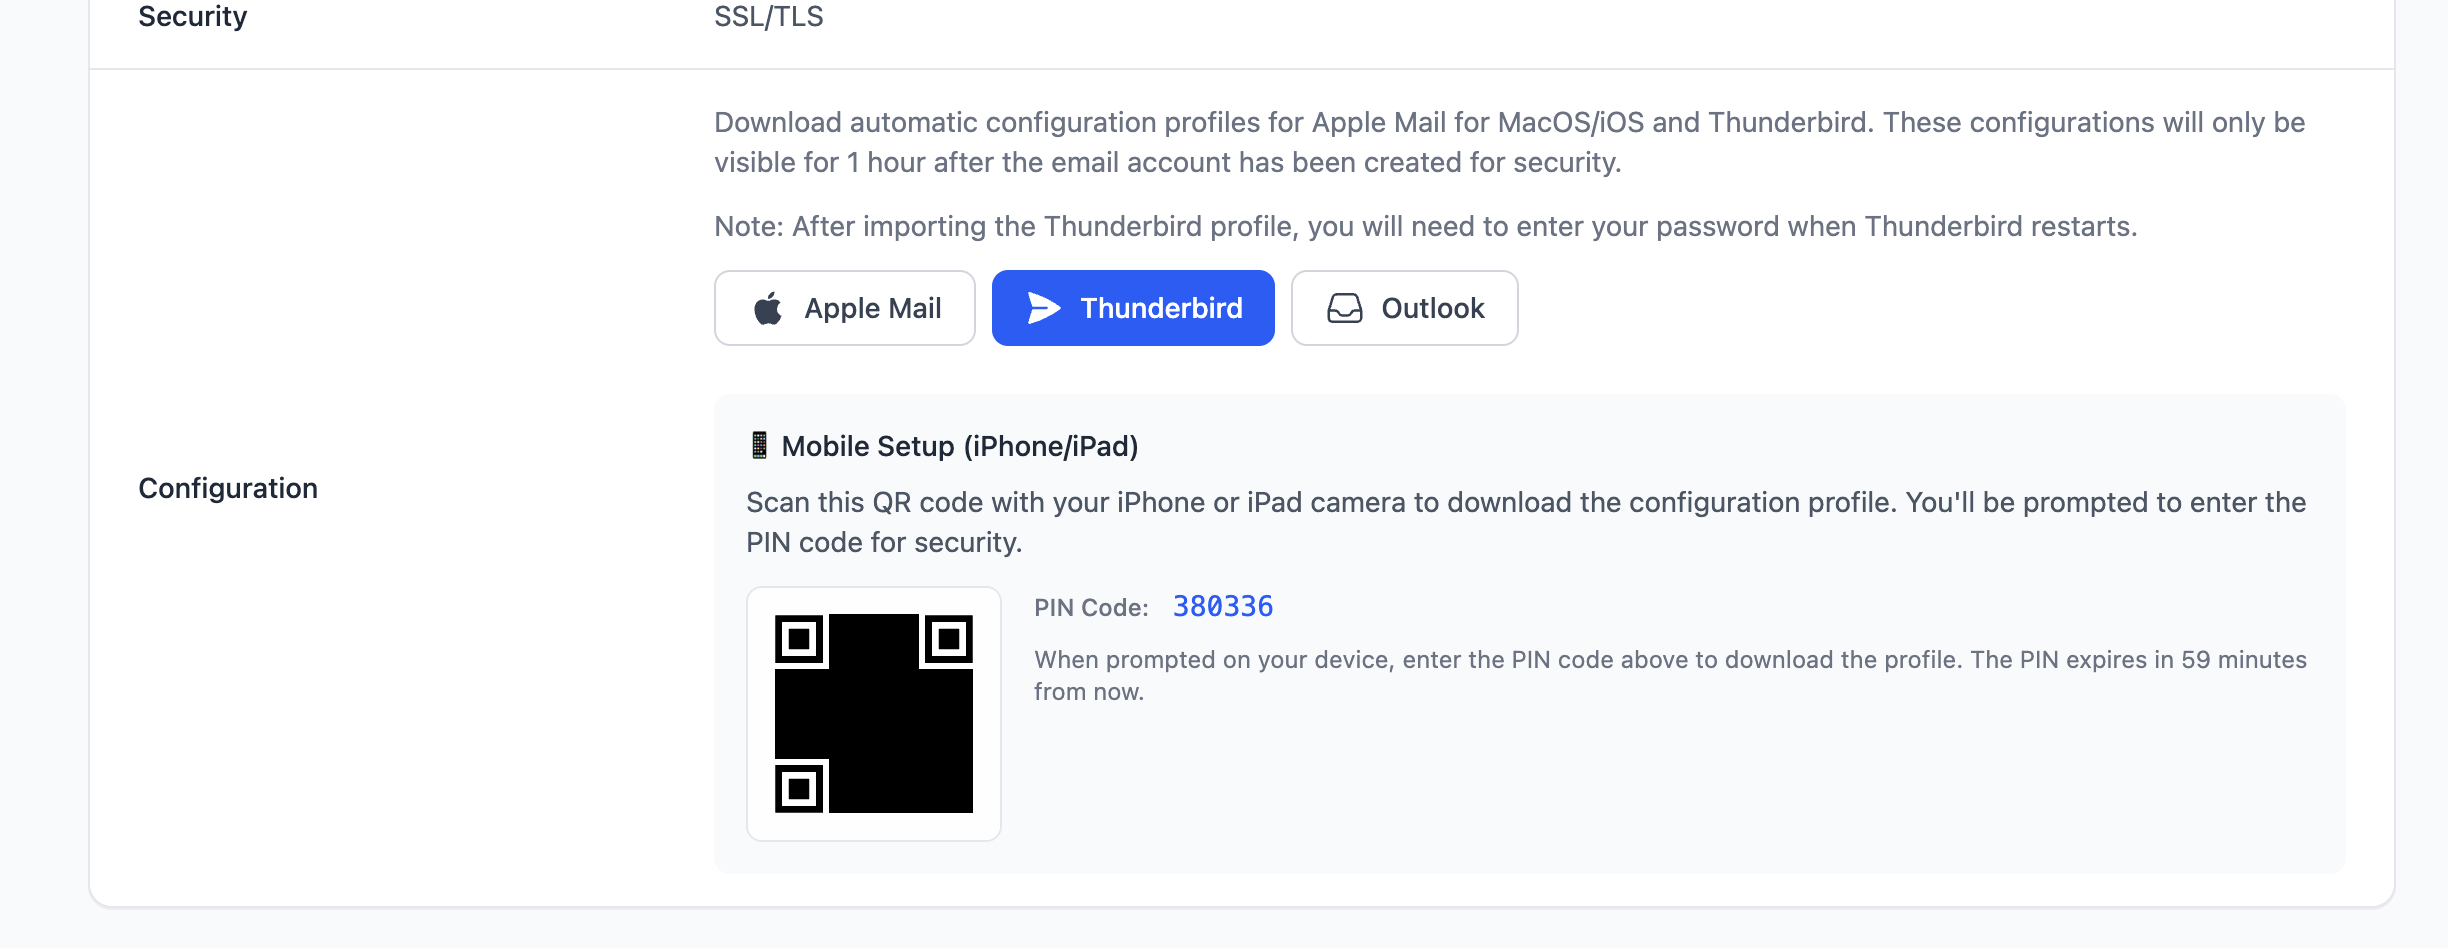
Option 1: QR Code Provisioning (Recommended)
- After creating your account, locate the QR code displayed in the account details
- Open the Camera app on your iOS/iPadOS device
- Point the camera at the QR code
- Tap the notification that appears (this will open Safari)
- Enter the PIN number shown in your account details
- Follow the installation prompts
Note: The QR code and PIN are only valid for 1 hour after account creation, just like your password.
Option 2: Manual Profile Installation
Note: This method requires a Mac device to use AirDrop. AirDrop is not available on Windows PCs or other non-Apple devices.
- Download the profile to your Mac
- AirDrop the profile file to your iOS/iPadOS device (this will open in Safari)
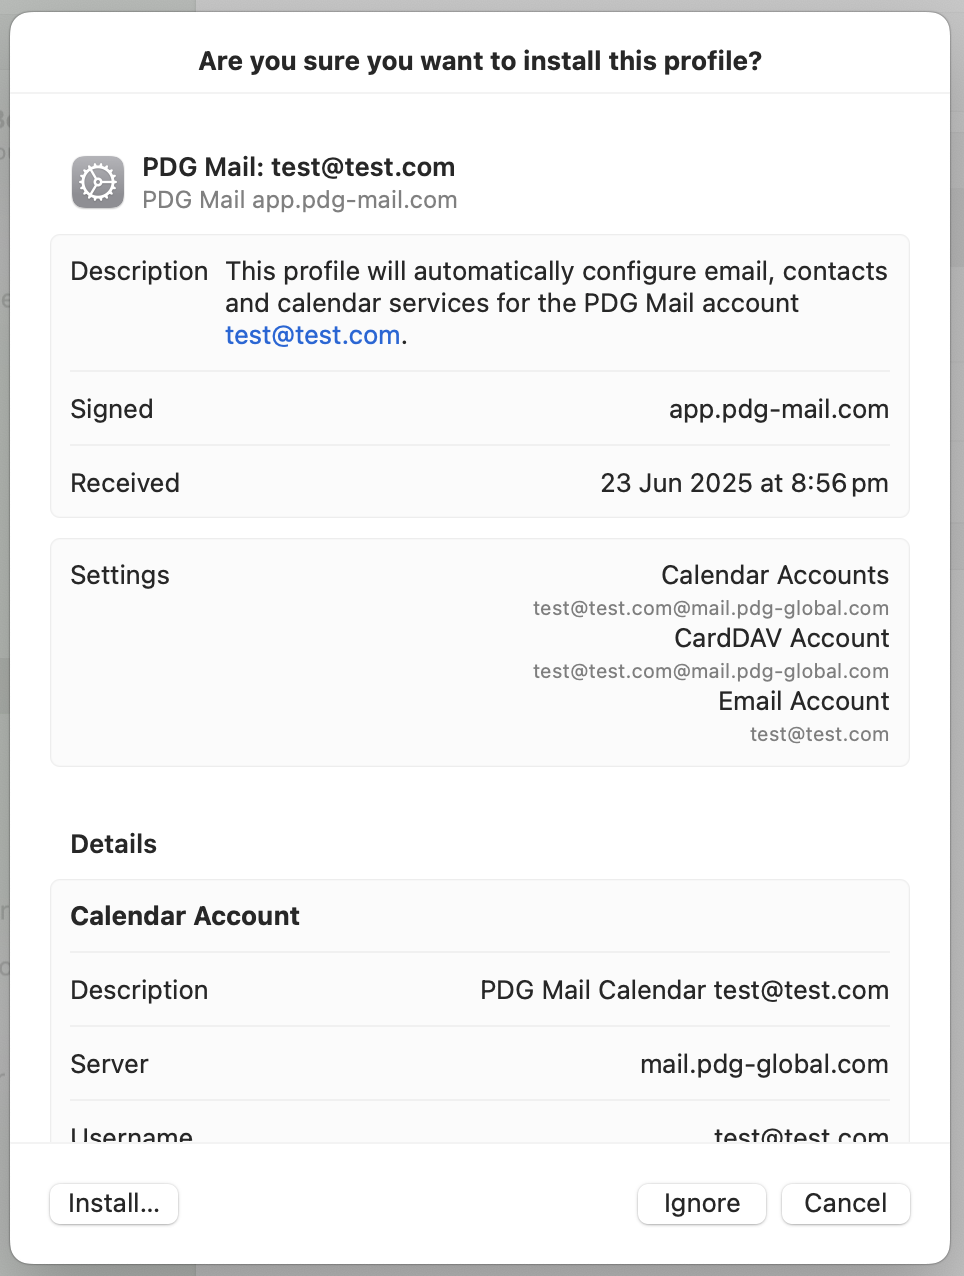
- Navigate to Settings
- Look for "Profile Downloaded"
- Click on the profile and follow the installation instructions
Note: Our profiles are digitally signed for enhanced security and authenticity.
MacOS Setup
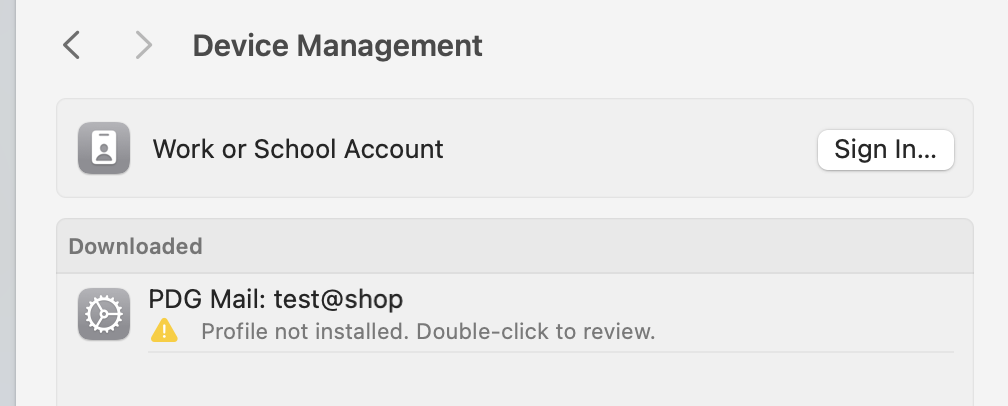
- Download the profile
- Double click the profile to install
- Navigate to Settings → Device Management (on MacOS Sequoia)
- Follow the installation instructions
Note: Our profiles are digitally signed for enhanced security and authenticity.
2. Automatic Configuration via DNS
If you're using our DNS servers or have set up the appropriate DNS records from the records shown in "Domains", some email clients will automatically configure the settings.
This will typically work in a modern version of:
- Outlook
- Thunderbird
3. Thunderbird Auto Provisioning
Set up Thunderbird using our auto provisioning profile.
- After creating an account, look for the Thunderbird profile download button
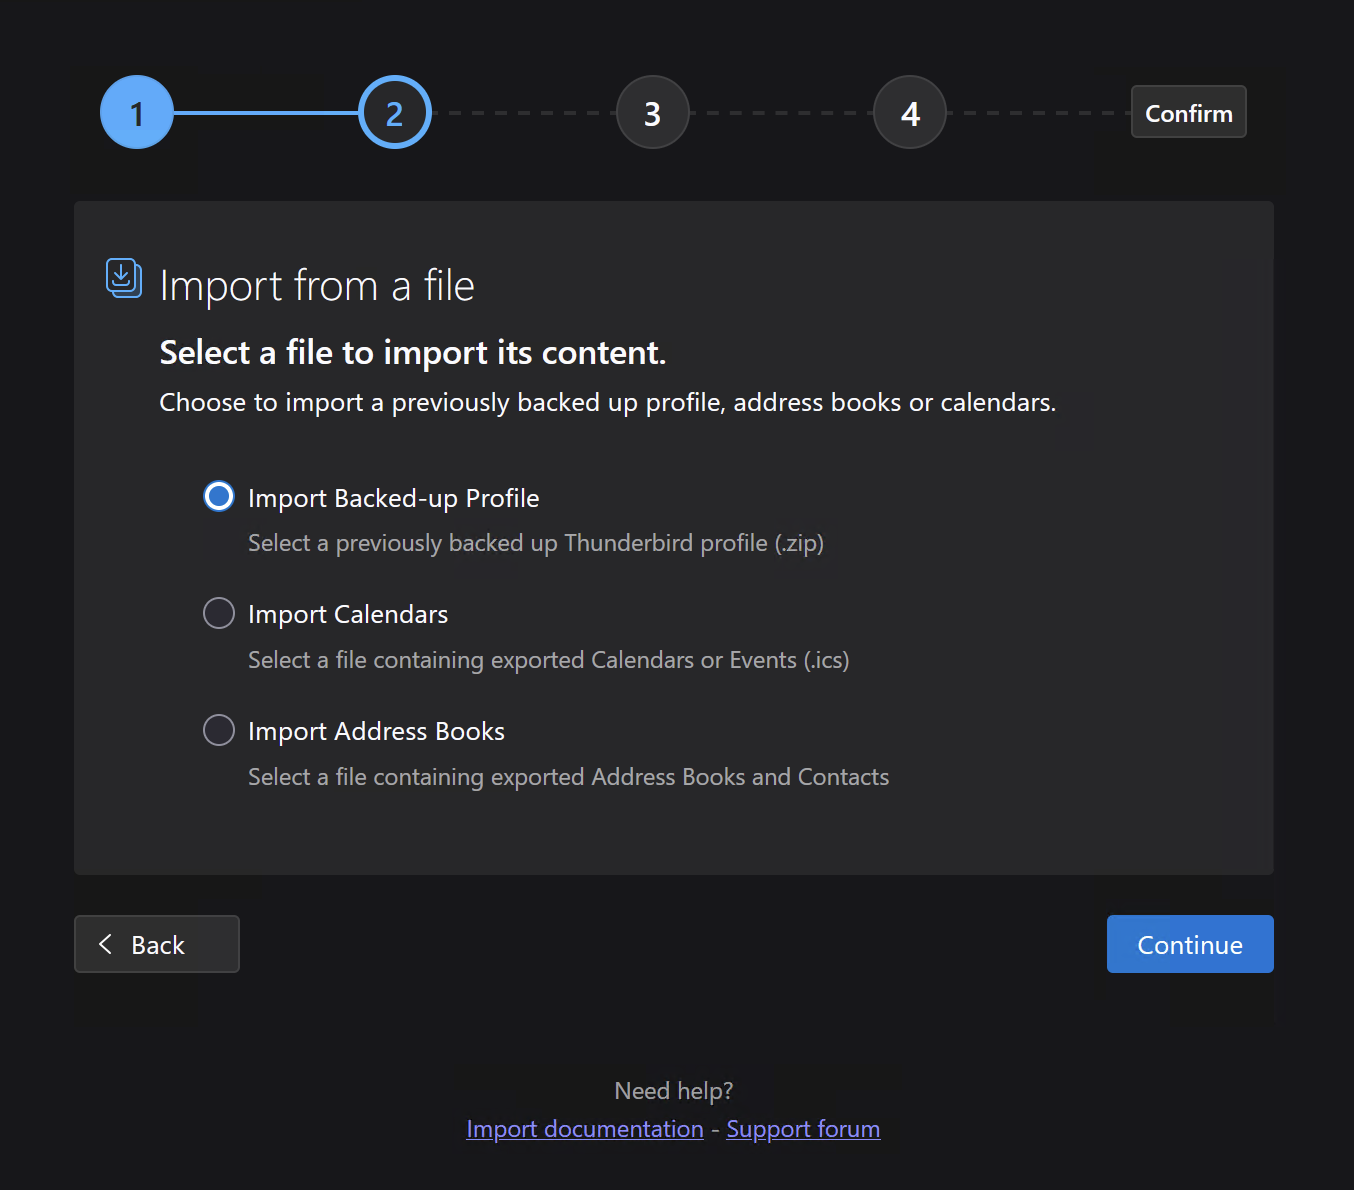
- In Thunderbird, go to Tools → Import
- Choose "Import from a file"
- Select "Import Backed-up profile"
- Choose the ZIP file you downloaded
- Enter your password when prompted (you can choose to save it in Thunderbird)
Note: The password will be visible in the PDG Mail admin for 1 hour after account creation.
4. Manual IMAP Setup
Configure your email client manually using these settings.
Incoming Mail Server (IMAP)
- Server: mail.pdg-global.com
- Port: 993
- Security: SSL
Outgoing Mail Server (SMTP)
- Server: mail.pdg-global.com
- Port: 465
- Security: SSL
Alternative SMTP settings: Port 587 with STARTTLS security
For both incoming and outgoing mail servers, authenticate using your email address and password. The password will be visible in the PDG Mail portal for 1 hour after account creation.
5. JMAP Setup
Configure your JMAP-compatible mail client.
- Open your JMAP-compatible mail client
- Enter your email address and password when prompted
- If asked for a JMAP server password, use: https://mail.pdg-global.com/
Need Help?
If you encounter any issues during setup, please:
- Check our Troubleshooting Guide
- Visit our Knowledge Base
- Contact our Support Team